Spring Boot整合Thymeleaf

1 关于模板引擎
- 市面上主流的 Java 模板引擎有:JSP、Velocity、Freemarker、Thymeleaf。
- JSP本质也是模板引擎,Spring Boot官方推荐使用“
Thymeleaf”模板引擎。
2 模板引擎的原理
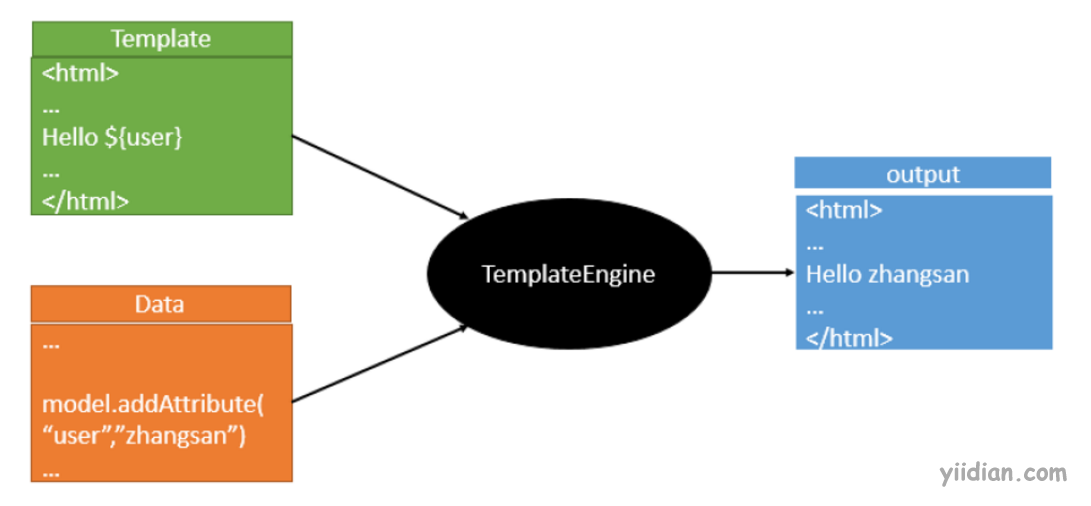
模板引擎原理图如下,模板引擎的作用都是将模板(页面)和数据进行整合然后输出显示,区别在于不同的模板使用不同的语法,如 JSP 的JSTL表达式,以及J SP 自己的表达式和语法,同理 Thymeleaf 也有自己的语法。
3 Spring Boot整合Thymeleaf
3.1 创建项目,导入依赖
<?xml version="1.0" encoding="UTF-8"?>
<project xmlns="http://maven.apache.org/POM/4.0.0"
         xmlns:xsi="http://www.w3.org/2001/XMLSchema-instance"
         xsi:schemaLocation="http://maven.apache.org/POM/4.0.0 http://maven.apache.org/xsd/maven-4.0.0.xsd">
    <modelVersion>4.0.0</modelVersion>

    <groupId>com.yiidian</groupId>
    <artifactId>ch03_04_springboot_thymeleaf</artifactId>
    <version>1.0-SNAPSHOT</version>
    <packaging>war</packaging>

    <!-- 导入springboot父工程. 注意:任何的SpringBoot工程都必须有的!!! -->
    <!-- 父工程的作用:锁定起步的依赖的版本号,并没有真正到依赖 -->
    <parent>
        <groupId>org.springframework.boot</groupId>
        <artifactId>spring-boot-starter-parent</artifactId>
        <version>2.1.11.RELEASE</version>
    </parent>

    <dependencies>
        <!--web起步依赖-->
        <dependency>
            <groupId>org.springframework.boot</groupId>
            <artifactId>spring-boot-starter-web</artifactId>
        </dependency>

        <!-- thymeleaf -->
        <dependency>
            <groupId>org.springframework.boot</groupId>
            <artifactId>spring-boot-starter-thymeleaf</artifactId>
        </dependency>
    </dependencies>
</project>
这里必须导入Thymeleaf的依赖!
3.2 编写Controller
package com.yiidian.controller;
import java.util.ArrayList;
import java.util.List;
import org.springframework.stereotype.Controller;
import org.springframework.ui.Model;
import org.springframework.web.bind.annotation.RequestMapping;
/**
* 控制器
* 一点教程网 - www.yiidian.com
*/
@Controller
public class UserController {
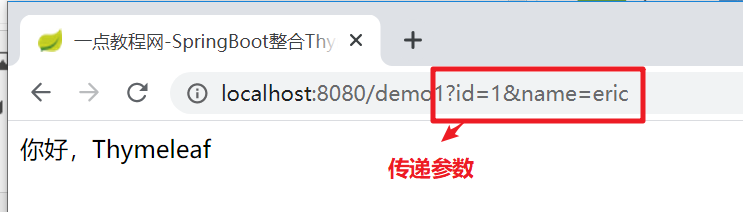
@RequestMapping("/demo1")
public String demo1(Model model){
model.addAttribute("message", "你好,Thymeleaf");
//跳转到templates/demo1.html
return "demo1";
}
}
在Controller里,我们往request域存入message属性值,待会在利用Thymeleaf模板标签进行获取。
3.3 编写模板页面

<!DOCTYPE html>
<html lang="en">
<head>
    <meta charset="UTF-8">
    <title>一点教程网-SpringBoot整合Thymeleaf</title>
</head>
<body>
<span th:text="${message}"></span>
</body>
</html>
注意以下几点:
- 模板文件必须放在
/resources/templates目录下,否则无法渲染 - Thymeleaf标签都是以th开头的
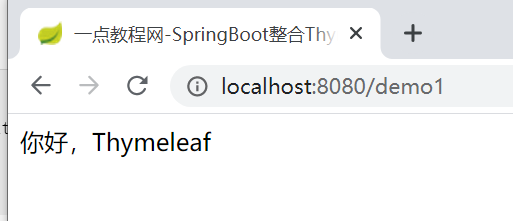
3.4 运行测试
源码下载:https://pan.baidu.com/s/1_6wS6VH2_qjtfvLstx3XxA
4 Thymeleaf基本语法
4.1 变量输出
1)方法代码
//变量输出
@RequestMapping("/demo2")
public String demo2(Model model){
	model.addAttribute("name", "张三");
	return "demo2";
}
2)页面代码
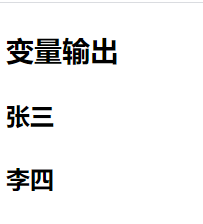
<h3>变量输出</h3>
<h4 th:text="${name}"></h4>
<h4 th:text="李四"></h4>
3)效果
4.2 条件判断
1)方法代码
//条件判断
@RequestMapping("/demo3")
public String demo3(Model model){
	model.addAttribute("gender", "女");

	model.addAttribute("grade",3);
	return "demo2";
}
2)页面代码
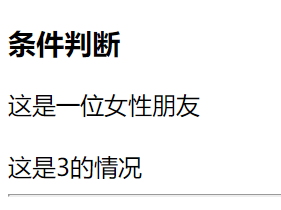
<h3>条件判断</h3>
<div th:if="${gender} == '男'">
	这是一位男性朋友
</div>
<div th:if="${gender} == '女'">
	这是一位女性朋友
</div>
<br/>
<div th:switch="${grade}">
	<span th:case="1">这是1的情况</span>
	<span th:case="2">这是2的情况</span>
	<span th:case="3">这是3的情况</span>
</div>
3)效果
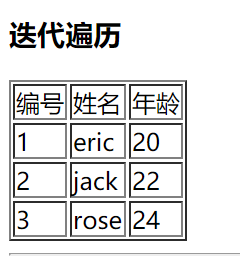
4.3 迭代遍历
1)方法代码
//迭代遍历
@RequestMapping("/demo4")
public String demo4(Model model){
	List<User> list = new ArrayList<User>();
	list.add(new User(1,"eric",20));
	list.add(new User(2,"jack",22));
	list.add(new User(3,"rose",24));

	model.addAttribute("list", list);

	return "demo2";
}
2)页面代码
<h3>迭代遍历</h3>
<table border="1">
	<tr>
		<td>编号</td>
		<td>姓名</td>
		<td>年龄</td>
	</tr>
	<tr th:each="user : ${list}">
		<td th:text="${user.id}"></td>
		<td th:text="${user.name}"></td>
		<td th:text="${user.age}"></td>
	</tr>
</table>
3)效果
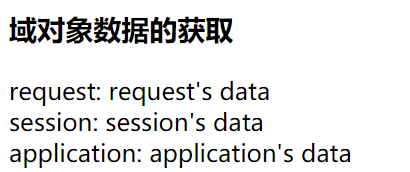
4.4 域对象使用
1)方法代码
//域对象的获取
@RequestMapping("/demo5")
public String demo5(HttpServletRequest request, Model model){

	//request
	request.setAttribute("request", "request's data");

	//session
	request.getSession().setAttribute("session", "session's data");

	//application
	request.getSession().getServletContext().setAttribute("application", "application's data");

	return "demo2";
}
2)页面代码
<h3>域对象数据的获取</h3>
request: <span th:text="${#httpServletRequest.getAttribute('request')}"></span><br/>
session: <span th:text="${session.session}"></span><br/>
application: <span th:text="${application.application}"></span><br/>
3)效果
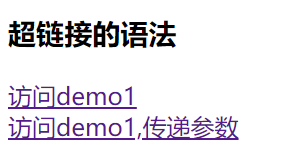
4.5 超链接
1)页面代码
<h3>超链接的语法</h3>
<a th:href="@{~/demo1}">访问demo1</a><br/>

<a th:href="@{~/demo1(id=1,name=eric)}">访问demo1,传递参数</a>
2)效果
热门文章
优秀文章
