Spring整合Jdbc的HelloWorld

一、JdbcTemplate概述
它是spring框架中提供的一个对象,是对原始Jdbc API对象的简单封装。spring框架为我们提供了很多的操作模板类,入下图所示:
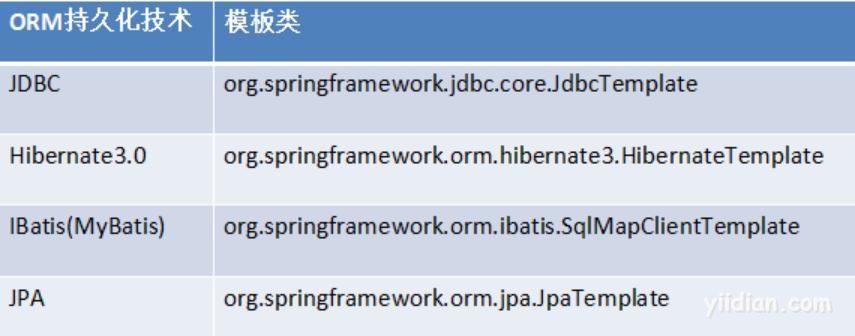
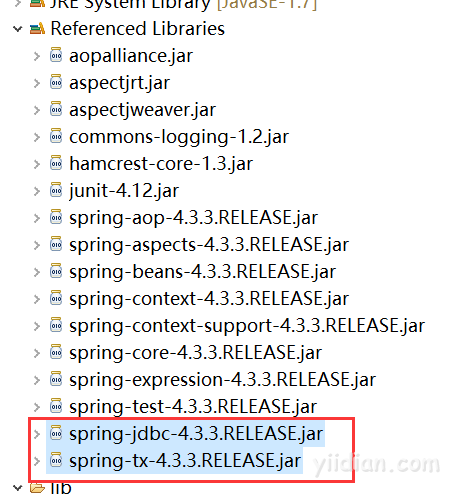
本教程的主角在spring-jdbc-4.3.3.RELEASE.jar中,我们在导包的时候,除了要导入这个jar包外,还需要导入一个spring-tx-4.3.3.RELEASE.jar(它是和事务相关的)。
二、JdbcTemplate对象的创建
我们可以参考它的源码,来一探究竟:
public JdbcTemplate() {
    }

    public JdbcTemplate(DataSource dataSource) {
        setDataSource(dataSource);
        afterPropertiesSet();
    }

    public JdbcTemplate(DataSource dataSource, boolean lazyInit) {
        setDataSource(dataSource);
        setLazyInit(lazyInit);
        afterPropertiesSet();
    }
除了默认构造函数之外,都需要提供一个数据源。既然有set方法,依据我们之前学过的依赖注入,我们可不可以在配置文件中配置呢?
答案是肯定的。
三、Spring中配置数据源
3.1、编写spring的配置文件
<?xml version="1.0" encoding="UTF-8"?>
<beans xmlns="http://www.springframework.org/schema/beans"
        xmlns:xsi="http://www.w3.org/2001/XMLSchema-instance"
        xsi:schemaLocation="http://www.springframework.org/schema/beans
        http://www.springframework.org/schema/beans/spring-beans.xsd">

</beans>
3.2、配置数据源
这里可以导入两种数据源,一个是C3P0,一个是DBCP。要想使用这两数据源都需要导入对应的jar包。
- 配置C3P0数据源
导入到工程的lib目录。在spring的配置文件中配置:
<bean id="dataSource" class="com.mchange.v2.c3p0.ComboPooledDataSource">
    <property name="driverClass" value="com.mysql.jdbc.Driver"></property>
    <property name="jdbcUrl" value="jdbc:mysql:///spring"></property>
    <property name="user" value="root"></property>
    <property name="password" value="root"></property>
</bean>
- 配置DBCP数据源
导入到工程的lib目录。在spring的配置文件中配置:
<!-- 配置数据源 -->
<bean id="dataSource" class="org.apache.commons.dbcp.BasicDataSource">
    <property name="driverClassName" value="com.mysql.jdbc.Driver"></property>
    <property name="url" value="jdbc:mysql:// /spring"></property>
    <property name="username" value="root"></property>
    <property name="password" value="root"></property>
</bean>
- 配置spring内置数据源
spring框架也提供了一个内置数据源,我们也可以使用spring的内置数据源,它就在spring-jdbc-4.3.3.REEASE.jar包中:
<bean id="dataSource" class="org.springframework.jdbc.datasource.DriverManagerDataSource">
    <property name="driverClassName" value="com.mysql.jdbc.Driver"></property>
    <property name="url" value="jdbc:mysql:///spring"></property>
    <property name="username" value="root"></property>
    <property name="password" value="root"></property>
</bean>
3.3、将数据库连接的信息配置到属性文件中
【定义属性文件】
jdbc.driverClass=com.mysql.jdbc.Driver
jdbc.url=jdbc:mysql:///spring
jdbc.username=root
jdbc.password=root
【引入外部的属性文件】
一种方式:
 <!-- 引入外部属性文件: -->
    <bean class="org.springframework.beans.factory.config.PropertyPlaceholderConfigurer">
        <property name="location" value="classpath:jdbc.properties"/>
    </bean>
二种方式:
<context:property-placeholder location="classpath:jdbc.properties"/>
四、创建数据库和表
创建数据库:
create database spring;
use spring;
创建表:
create table account(
id int primary key auto_increment,
name varchar(40),
money float
)character set utf8 collate utf8_general_ci;
create database spring;
use spring;
创建表:
create table account(
id int primary key auto_increment,
name varchar(40),
money float
)character set utf8 collate utf8_general_ci;
五、在spring配置文件中配置JdbcTemplate
<?xml version="1.0" encoding="UTF-8"?>
<beans xmlns="http://www.springframework.org/schema/beans"
	xmlns:xsi="http://www.w3.org/2001/XMLSchema-instance"
	xsi:schemaLocation="
        http://www.springframework.org/schema/beans
        http://www.springframework.org/schema/beans/spring-beans.xsd">

     <bean class="org.springframework.beans.factory.config.PropertyPlaceholderConfigurer">
     	<property name="location" value="classpath:jdbc.properties"/>
     </bean>

     <bean id="jdbcTemplate" class="org.springframework.jdbc.core.JdbcTemplate">
     	<property name="dataSource" ref="dataSource"/>
     </bean>

      <bean id="dataSource" class="org.springframework.jdbc.datasource.DriverManagerDataSource">
     	<property name="driverClassName" value="${jdbc.driverClass}"/>
     	<property name="url" value="${jdbc.url}"/>
     	<property name="username" value="${jdbc.username}"/>
     	<property name="password" value="${jdbc.password}"/>
     </bean>

</beans>
</beans>
六、编写测试类
package com.yiidian.test;
import org.springframework.context.ApplicationContext;
import org.springframework.context.support.ClassPathXmlApplicationContext;
import org.springframework.jdbc.core.JdbcTemplate;
/**
* @author http://www.yiidian.com
*
*/
public class JdbcTemplateDemo {
public static void main(String[] args) {
// 1.获取Spring容器
ApplicationContext ac = new ClassPathXmlApplicationContext("applicationContext.xml");
// 2.根据id获取bean对象
JdbcTemplate jt = (JdbcTemplate) ac.getBean("jdbcTemplate");
// 3.执行操作
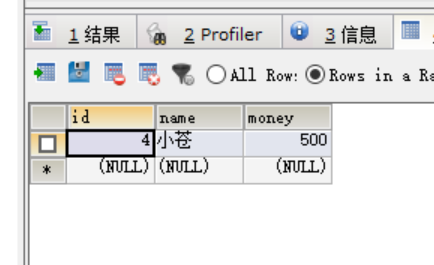
jt.execute("insert into account(name,money)values('小苍',500)");
}
}
七、运行结果
热门文章
优秀文章
