SSH整合案例

为了完成SSH的整合,我们可以大致把步骤分为六个步骤,逐步把SSH框架整合完成。
1 单独使用Hibernate
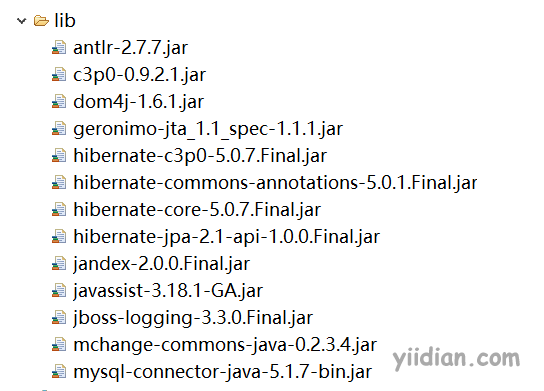
1.1 导入hibernate相关包
1.2 编写实体类
package com.yiidian.domain;
import java.io.Serializable;
/**
 * 用户实体
 * @author 一点教程(yiidian.com)
 */
public class Customer implements Serializable{

	private Long id;
	private String custName;
	private String custPhone;
	private String custAddress;
	public Long getId() {
		return id;
	}
	public void setId(Long id) {
		this.id = id;
	}
	public String getCustName() {
		return custName;
	}
	public void setCustName(String custName) {
		this.custName = custName;
	}
	public String getCustPhone() {
		return custPhone;
	}
	public void setCustPhone(String custPhone) {
		this.custPhone = custPhone;
	}
	public String getCustAddress() {
		return custAddress;
	}
	public void setCustAddress(String custAddress) {
		this.custAddress = custAddress;
	}

}
1.3 编写hbm映射文件
在实体类同级目录下创建映射文件

<?xml version="1.0" encoding="UTF-8"?>
<!DOCTYPE hibernate-mapping PUBLIC
    "-//Hibernate/Hibernate Mapping DTD 3.0//EN"
    "http://www.hibernate.org/dtd/hibernate-mapping-3.0.dtd">
<hibernate-mapping>
	<class name="com.yiidian.domain.Customer" table="t_customer">
		<id name="id" column="id">
			<generator class="native"></generator>
		</id>
		<property name="custName" column="cust_name"></property>
		<property name="custPhone" column="cust_phone"></property>
		<property name="custAddress" column="cust_address"></property>
	</class>
</hibernate-mapping>
1.4 编写hibernate.cfg.xml
<?xml version="1.0" encoding="UTF-8"?>
<!DOCTYPE hibernate-configuration PUBLIC
	"-//Hibernate/Hibernate Configuration DTD 3.0//EN"
	"http://www.hibernate.org/dtd/hibernate-configuration-3.0.dtd">
<hibernate-configuration>
	<session-factory>
	    <!-- 数据库连接-->
		<property name="hibernate.connection.url">jdbc:mysql:///ssh</property>
		<property name="hibernate.connection.driver_class">com.mysql.jdbc.Driver</property>
		<property name="hibernate.connection.username">root</property>
		<property name="hibernate.connection.password">root</property>
		<property name="hibernate.dialect">org.hibernate.dialect.MySQLDialect</property>
		<property name="hibernate.show_sql">true</property>
		<property name="hibernate.format_sql">true</property>
		<property name="hibernate.hbm2ddl.auto">update</property>

		<!-- 开启从当前线程获取Session的功能 -->
		<property name="current_session_context_class">thread</property>

		<mapping resource="com/yiidian/domain/Customer.hbm.xml"/>
	</session-factory>
</hibernate-configuration>
1.5 测试Hibernate程序
package com.yiidian.test;

import org.hibernate.Session;
import org.hibernate.SessionFactory;
import org.hibernate.Transaction;
import org.hibernate.cfg.Configuration;
import com.yiidian.domain.Customer;
/**
 * 一点教程(yiidian.com)
 */
public class TestHibernate {
	public static void main(String[] args) {
		// 1.加载hibernate.cfg.xml
		Configuration cfg = new Configuration();
		cfg.configure();

		// 2.创建SessoinFactory
		SessionFactory sessionFactory = cfg.buildSessionFactory();

		// 3.开启Session
		Session session = sessionFactory.getCurrentSession();

		// 4.开启事务
		Transaction tx = session.beginTransaction();

		// 5.保存数据
		Customer c = new Customer();
		c.setCustName("张三");
		c.setCustPhone("020-33332222");
		c.setCustAddress("一点教程网-广州");
		session.save(c);

		// 6.提交事务
		tx.commit();
	}
}
1.6 查看结果
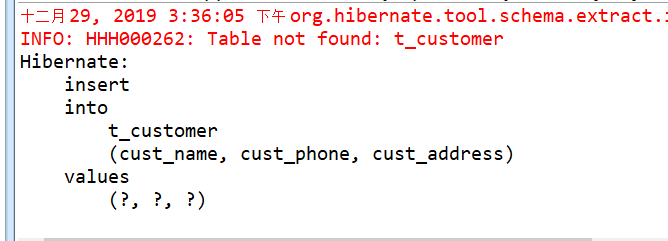

到此为止,我们项目已经可以成功运行Hibernate环境了!
2 单独使用Spring
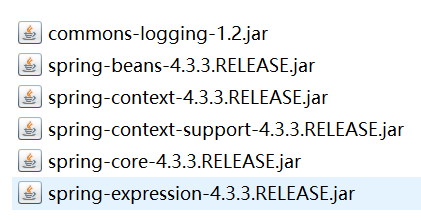
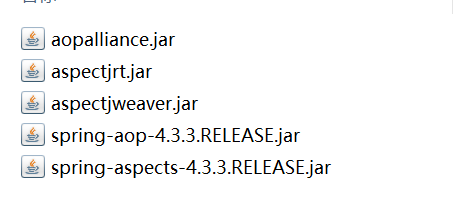
2.1 导入Spring相关包
需要导入SpringIOC和SpringAOP相关包
2.2 编写Dao接口和实现
接口:
package com.yiidian.dao;
import com.yiidian.domain.Customer;
/**
 * Dao接口
 * @author 一点教程(yiidian.com)
 */
public interface CustomerDao {
	public void save(Customer customer);
}
实现:
package com.yiidian.dao.impl;
import com.yiidian.dao.CustomerDao;
import com.yiidian.domain.Customer;
/**
 * Dao实现
 * @author 一点教程(yiidian.com)
 */
public class CustomerDaoImpl implements CustomerDao {
	@Override
	public void save(Customer customer) {
		System.out.println("save customer...");
	}

}
2.3 编写Service接口和实现
接口:
package com.yiidian.service;
import com.yiidian.domain.Customer;
/**
 * Service接口
 * @author 一点教程(yiidian.com)
 */
public interface CustomerService {
	public void save(Customer customer);
}
实现:
package com.yiidian.service.impl;
import com.yiidian.dao.CustomerDao;
import com.yiidian.domain.Customer;
import com.yiidian.service.CustomerService;
/**
 * Service实现
 * @author 一点教程(yiidian.com)
 */
public class CustomerServiceImpl implements CustomerService {
	//注入CustomerDao
	private CustomerDao customerDao;
	public void setCustomerDao(CustomerDao customerDao) {
		this.customerDao = customerDao;
	}
	@Override
	public void save(Customer customer) {
		customerDao.save(customer);
	}
}
2.4 applicationContext.xml
<?xml version="1.0" encoding="UTF-8"?>
<beans xmlns="http://www.springframework.org/schema/beans"
    xmlns:xsi="http://www.w3.org/2001/XMLSchema-instance"
    xsi:schemaLocation="
        http://www.springframework.org/schema/beans http://www.springframework.org/schema/beans/spring-beans.xsd">
	<!-- 创建Dao对象 -->
	<bean id="customerDao" class="com.yiidian.dao.impl.CustomerDaoImpl"></bean>
	<!-- 创建Service对象 -->
	<bean id="customerService" class="com.yiidian.service.impl.CustomerServiceImpl">
		<!-- 依赖注入Dao对象 -->
		<property name="customerDao" ref="customerDao"/>
	</bean>

</beans>
2.5 测试Spring程序
package com.yiidian.test;
import org.springframework.context.ApplicationContext;
import org.springframework.context.support.ClassPathXmlApplicationContext;
import com.yiidian.service.CustomerService;
/**
 * 一点教程(yiidian.com)
 */
public class TestSpring {
	public static void main(String[] args) {
		ApplicationContext ac = new ClassPathXmlApplicationContext("/applicationContext.xml");
		CustomerService customerService = (CustomerService)ac.getBean("customerService");
		customerService.save(null);
	}
}
2.6 查询运行结果
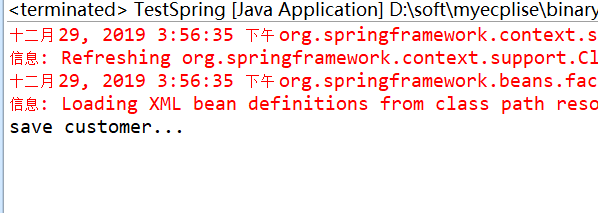 可以看到,程序已经成功调用了业务层的方法,代表Spring环境已经成功搭建!
3 Spring整合Hibernate
Spring框架整合Hibernate框架的重点,在于由Spring创建SessionFactory对象。
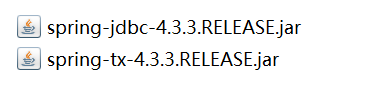
3.1 导入spring-orm整合包

3.2 修改Dao类
package com.yiidian.dao.impl;
import org.springframework.orm.hibernate5.HibernateTemplate;

import com.yiidian.dao.CustomerDao;
import com.yiidian.domain.Customer;
/**
 * Dao实现
 * @author 一点教程(yiidian.com)
 */
public class CustomerDaoImpl implements CustomerDao {
	//注入Spring提供HibernateTemplate类
	private HibernateTemplate hibernateTemplate;
	public void setHibernateTemplate(HibernateTemplate hibernateTemplate) {
		this.hibernateTemplate = hibernateTemplate;
	}
	@Override
	public void save(Customer customer) {
		hibernateTemplate.save(customer);
	}

}
3.3 applicationContext.xml
<?xml version="1.0" encoding="UTF-8"?>
<beans xmlns="http://www.springframework.org/schema/beans"
    xmlns:xsi="http://www.w3.org/2001/XMLSchema-instance"
    xsi:schemaLocation="
        http://www.springframework.org/schema/beans http://www.springframework.org/schema/beans/spring-beans.xsd">
	<!-- 创建Dao对象 -->
	<bean id="customerDao" class="com.yiidian.dao.impl.CustomerDaoImpl">
		<property name="hibernateTemplate" ref="hibernateTemplate"/>
	</bean>

	<bean id="hibernateTemplate" class="org.springframework.orm.hibernate5.HibernateTemplate">
		<property name="sessionFactory" ref="sessionFactory"/>
	</bean>

	<bean id="sessionFactory" class="org.springframework.orm.hibernate5.LocalSessionFactoryBean">
		<property name="configLocation" value="classpath:hibernate.cfg.xml"></property>
	</bean>

	<!-- 创建Service对象 -->
	<bean id="customerService" class="com.yiidian.service.impl.CustomerServiceImpl">
		<!-- 依赖注入Dao对象 -->
		<property name="customerDao" ref="customerDao"/>
	</bean>

</beans>
3.4 编写测试代码
package com.yiidian.test;
import org.springframework.context.ApplicationContext;
import org.springframework.context.support.ClassPathXmlApplicationContext;

import com.yiidian.domain.Customer;
import com.yiidian.service.CustomerService;
/**
 * 一点教程(yiidian.com)
 */
public class TestSpringHibernate {
	public static void main(String[] args) {
		ApplicationContext ac = new ClassPathXmlApplicationContext("/applicationContext.xml");
		CustomerService customerService = (CustomerService)ac.getBean("customerService");
		Customer cust = new Customer();
		cust.setCustName("李四");
		cust.setCustPhone("020-44444444");
		cust.setCustAddress("广州-一点教程网");
		customerService.save(cust);
	}
}
运行上面的测试后,发现程序报错,错误为:
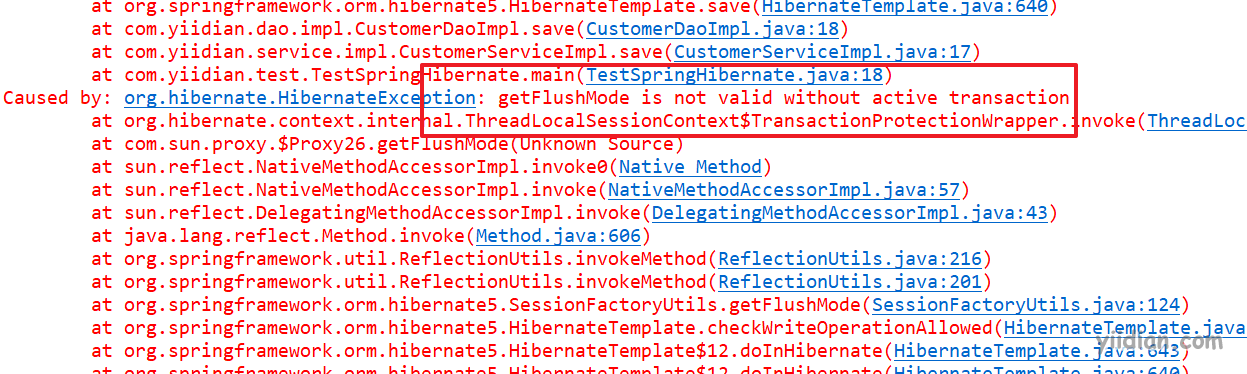
这个错误是因为Spring在HibernateTemplate的save方法中,进行检查当前操作是否开启事务,如果没有开启事务,则无法执行此操作。解决方案是:在业务层引入Spring的声明式事务。
3.5 配置Spring声明式事务
<?xml version="1.0" encoding="UTF-8"?>
<beans xmlns="http://www.springframework.org/schema/beans"
    xmlns:xsi="http://www.w3.org/2001/XMLSchema-instance"
    xmlns:tx="http://www.springframework.org/schema/tx"
    xmlns:aop="http://www.springframework.org/schema/aop"
    xsi:schemaLocation="
        http://www.springframework.org/schema/beans http://www.springframework.org/schema/beans/spring-beans.xsd
        http://www.springframework.org/schema/tx http://www.springframework.org/schema/tx/spring-tx.xsd
        http://www.springframework.org/schema/aop http://www.springframework.org/schema/aop/spring-aop.xsd">
	<!-- 创建Dao对象 -->
	<bean id="customerDao" class="com.yiidian.dao.impl.CustomerDaoImpl">
		<property name="hibernateTemplate" ref="hibernateTemplate"/>
	</bean>

	<bean id="hibernateTemplate" class="org.springframework.orm.hibernate5.HibernateTemplate">
		<property name="sessionFactory" ref="sessionFactory"/>
	</bean>

	<bean id="sessionFactory" class="org.springframework.orm.hibernate5.LocalSessionFactoryBean">
		<property name="configLocation" value="classpath:hibernate.cfg.xml"></property>
	</bean>

	<!-- 创建Service对象 -->
	<bean id="customerService" class="com.yiidian.service.impl.CustomerServiceImpl">
		<!-- 依赖注入Dao对象 -->
		<property name="customerDao" ref="customerDao"/>
	</bean>

    <!-- Spring的事务管理配置 -->
	<!-- 1.事务管理器 -->
	<bean id="transactionManager" class="org.springframework.orm.hibernate5.HibernateTransactionManager">
		<property name="sessionFactory" ref="sessionFactory"/>
	</bean>

	<!-- 2.事务通知 -->
	<tx:advice id="txAdvice" transaction-manager="transactionManager">
		<tx:attributes>
			<tx:method name="*" isolation="DEFAULT" propagation="REQUIRED"/>
		</tx:attributes>
	</tx:advice>

	<!-- 3.事务切面 -->
	<aop:config>
		<aop:pointcut expression="execution(* com.yiidian.service.impl.*ServiceImpl.*(..))" id="pt"/>
		<aop:advisor advice-ref="txAdvice" pointcut-ref="pt"/>
	</aop:config>
</beans>
再次运行测试类,发现报错说没有数据源

原因是Spring整合Hibernate应用,必须要引入数据源(连接池)
3.6 配置数据源
<!-- hibernate与c3p0整合 -->
<property name="hibernate.connection.provider_class">org.hibernate.c3p0.internal.C3P0ConnectionProvider</property>
注意:spring整合了hibernate之后,spring默认把Session绑定到了当前线程,所以在Hibernate的配置中,需要删除以下配置:
<property name="current_session_context_class">thread</property>
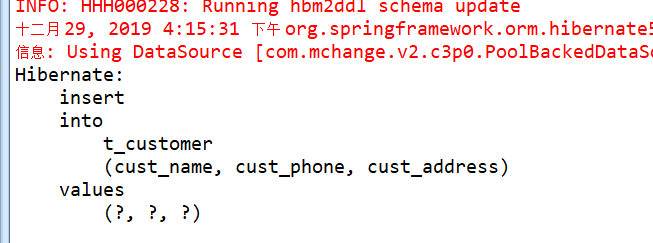
最后运行测试类,就成功啦
4 单独使用Struts2
4.1 导入Struts的核心包
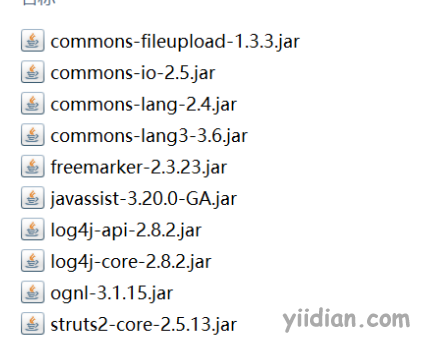
4.2 配置Struts2过滤器
<?xml version="1.0" encoding="UTF-8"?>
<web-app xmlns:xsi="http://www.w3.org/2001/XMLSchema-instance" xmlns="http://java.sun.com/xml/ns/javaee" xsi:schemaLocation="http://java.sun.com/xml/ns/javaee http://java.sun.com/xml/ns/javaee/web-app_3_0.xsd" id="WebApp_ID" version="3.0">
  <display-name>cho4_08_struts2_ssh</display-name>
  <!-- 启动Struts2 -->
  <filter>
  	<filter-name>struts2</filter-name>
  	<filter-class>org.apache.struts2.dispatcher.filter.StrutsPrepareAndExecuteFilter</filter-class>
  </filter>
  <filter-mapping>
  	<filter-name>struts2</filter-name>
  	<url-pattern>/*</url-pattern>
  </filter-mapping>
</web-app>
4.3 编写Action类
package com.yiidian.action;
import com.opensymphony.xwork2.ActionSupport;
/**
 * Action类
 * @author 一点教程(yiidian.com)
 */
public class CustomerAction extends ActionSupport{
	public String save(){
		System.out.println("执行CustomerAction的save");
		return SUCCESS;
	}
}
4.4 struts.xml配置Action
<?xml version="1.0" encoding="UTF-8"?>
<!DOCTYPE struts PUBLIC
	"-//Apache Software Foundation//DTD Struts Configuration 2.5//EN"
	"http://struts.apache.org/dtds/struts-2.5.dtd">
<struts>
	<package name="base" extends="struts-default" namespace="/customer">
		<action name="save" class="com.yiidian.action.CustomerAction" method="save">
			<result>/succ.jsp</result>
		</action>
	</package>
</struts>
4.5 编写JSP页面
reg.jsp
<%@ page language="java" import="java.util.*" pageEncoding="UTF-8"%>
<!DOCTYPE HTML PUBLIC "-//W3C//DTD HTML 4.01 Transitional//EN">
<html>
  <head>
    <title>一点教程-注册页面</title>
  </head>
  <body>
    <form action="customer/save.action" method="post">
    	客户姓名:<input type="text" name="custName"/><br/>
    	客户电话:<input type="text" name="custPhone"/><br/>
    	客户地址:<input type="text" name="custAddress"/><br/>
    	<input type="submit" value="提交"/>
    </form>
  </body>
</html>
succ.jsp
<%@ page language="java" import="java.util.*" pageEncoding="UTF-8"%>
<!DOCTYPE HTML PUBLIC "-//W3C//DTD HTML 4.01 Transitional//EN">
<html>
  <head>
    <title>一点教程-提示页面</title>
  </head>
  <body>
      添加成功!
  </body>
</html>
4.6 运行测试
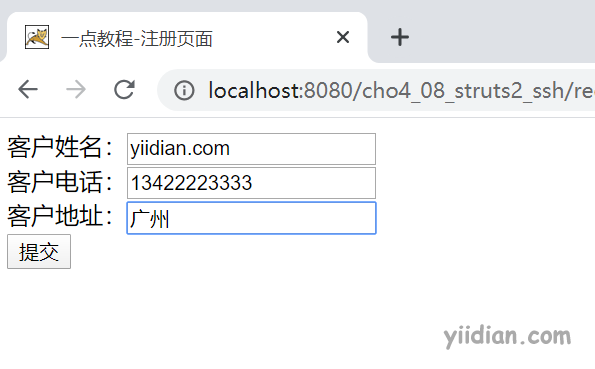
提交表单后,控制台输出
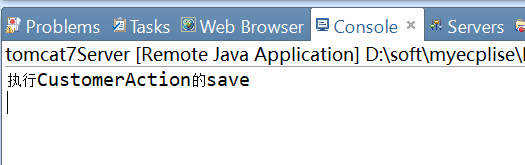
看到信息,代表Struts2环境已经搭建成功!
5 Spring整合Struts2
Spring框架提供Web监听器,实现在项目启动的时候,一次性读取applicationContext.xml文件。
5.1 导入spring-web包
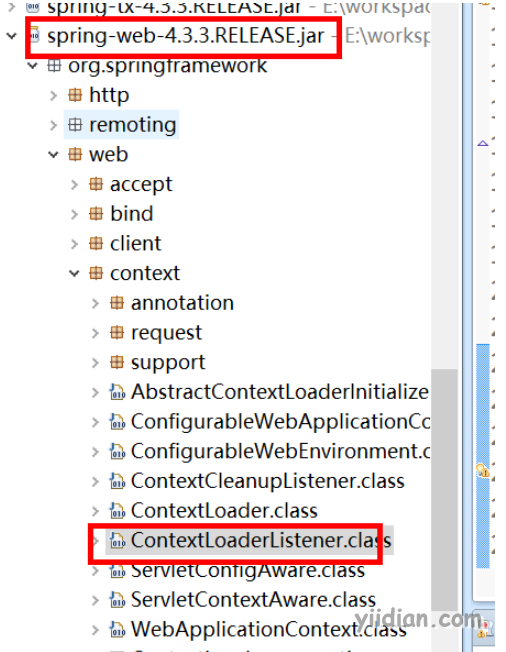
5.2 配置Spring监听器
<!-- spring的web监听器 -->
<listener>
	<listener-class>org.springframework.web.context.ContextLoaderListener</listener-class>
</listener>

<!--ContextLoaderListener监听器默认加载WEB-INF下的applicationContext.xml -->
<!-- 更新ContextLoaderListener读取文件的路径 -->
<context-param>
	<param-name>contextConfigLocation</param-name>
	<param-value>classpath:applicationContext.xml</param-value>
</context-param>
5.3 修改Action
package com.yiidian.action;

import org.apache.struts2.ServletActionContext;
import org.springframework.web.context.WebApplicationContext;
import org.springframework.web.context.support.WebApplicationContextUtils;

import com.opensymphony.xwork2.ActionSupport;
import com.opensymphony.xwork2.ModelDriven;
import com.yiidian.domain.Customer;
import com.yiidian.service.CustomerService;

/**
 * Action类
 *
 * @author 一点教程(yiidian.com)
 */
public class CustomerAction extends ActionSupport implements ModelDriven<Customer>{
	private CustomerService customerService;

	//模型驱动接收表单数据
	private Customer customer = new Customer();


	public String save() {

		// 使用Spring的web监听器读取配置信息
		WebApplicationContext ac = WebApplicationContextUtils
				.getWebApplicationContext(ServletActionContext
						.getServletContext());
		customerService = (CustomerService) ac.getBean("customerService");
		customerService.save(customer);

		return SUCCESS;
	}


	@Override
	public Customer getModel() {
		return customer;
	}
}
上面的Action类中,我们通过WebApplicationContext获取到CustomerService的对象。虽然可以成功调用Service层方法,但是这样的代码太麻烦,能不能简化呢?这时我们可以加入Struts2整合Spring的插件,完成Struts2与Spring的整合,从而把代码简化。
6 Struts2整合Spring
6.1 导入整合Spring插件
6.2 配置Action对象
<!-- 创建Action对象 -->
<bean id="customerAction" class="com.yiidian.action.CustomerAction" scope="prototype">
	<property name="customerService" ref="customerService"/>
</bean>
6.3 引用Spring创建的Action
<?xml version="1.0" encoding="UTF-8"?>
<!DOCTYPE struts PUBLIC
	"-//Apache Software Foundation//DTD Struts Configuration 2.5//EN"
	"http://struts.apache.org/dtds/struts-2.5.dtd">
<struts>
	<package name="base" extends="struts-default" namespace="/customer">
	    <!-- 这里customerAction的名称必须和Spring创建的Action对象的名称一致 -->
		<action name="save" class="customerAction" method="save">
			<result>/succ.jsp</result>
		</action>
	</package>
</struts>
6.4 Action类添加setter方法
private CustomerService customerService;
public void setCustomerService(CustomerService customerService) {
	this.customerService = customerService;
}
到此为止,我们已经完成了SSH框架的整合!
热门文章
优秀文章
