Hibernate 整合C3P0

下面看Hibernate如何整合连接池c3p0。
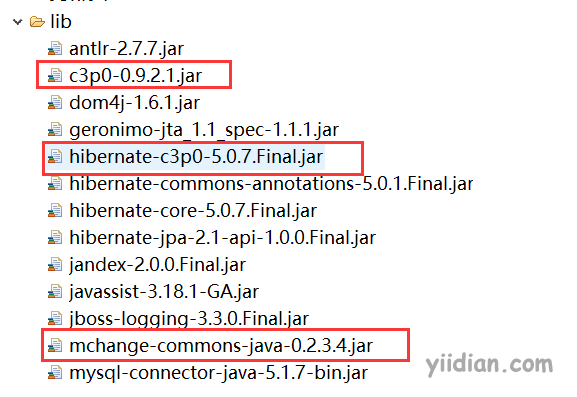
1 导入hibernate和c3p0整合包
2 添加c3p0配置
<?xml version="1.0" encoding="UTF-8"?>
<!DOCTYPE hibernate-configuration PUBLIC
	"-//Hibernate/Hibernate Configuration DTD 3.0//EN"
	"http://www.hibernate.org/dtd/hibernate-configuration-3.0.dtd">

<hibernate-configuration>
	<!-- 连接数据库的参数 -->
<session-factory>
	<!-- 1.连接数据库参数 -->
	<property name="hibernate.connection.driver_class">
		com.mysql.jdbc.Driver
	</property>
	<property name="hibernate.connection.url">
		jdbc:mysql://localhost:3306/hibernate
	</property>
	<property name="hibernate.connection.username">root</property>
	<property name="hibernate.connection.password">root</property>

	<!-- hibernate方言 -->
	<property name="hibernate.dialect">
		org.hibernate.dialect.MySQLDialect
	</property>

	<!-- Hibernate整合c3p0 -->
	<property name="hibernate.connection.provider_class">org.hibernate.c3p0.internal.C3P0ConnectionProvider</property>
	<!-- c3p0详细配置 -->
	<property name="c3p0.min_size">10</property>
	<property name="c3p0.max_size">20</property>

	<!-- 2.hibernate扩展参数 -->
	<property name="hibernate.show_sql">true</property>
	<property name="hibernate.format_sql">true</property>
	<property name="hibernate.hbm2ddl.auto">update</property>

	<!-- *.hbm.xml文件 -->
	<mapping resource="com/yiidian/domain/Customer.hbm.xml" />
	<mapping resource="com/yiidian/domain/Order.hbm.xml" />
</session-factory>
</hibernate-configuration>
3 编写代码测试是否添加成功
/**
 * 演示连接池的整合
 * @author http://www.yiidian.com
 *
 */
public class Demo {

	@Test
	public void test1(){

		Session session = HibernateUtil.getSession();

		session.doWork(new Work(){

			@Override
			public void execute(Connection connection) throws SQLException {
				System.out.println(connection);
			}
		});


		session.close();

	}


}
运行程序,控制台看到以下结果,证明Hibernate和c3p0整合成功。
com.mchange.v2.c3p0.impl.NewProxyConnection@19b5015c
热门文章
优秀文章
